Showing posts with label fermenting. Show all posts

Wednesday, September 9, 2015

Fermenting pickles Finnish style

I have always loved fermented pickles and preferred them over the vinegary pickles, since I was a child. In Finland we bought them from the grocery store from big barrels. They were often labeled "Russian pickles". Still now when I visit Finland I buy often for snacking even a package of two fermented pickles from the grocery store produce section.

People often ask for my recipe of pickles. I make them Finnish style, the way I am used to eating them, so here you go!

Fermenting pickles is a little bit more trickier than making sauerkraut or fermenting some other vegetables. Let me tell you the tricks for good pickles that are not mushy!

1. Choose cucumbers that are meant for pickling. They have a hard skin. Choose cucumbers that are firm and as fresh as possible. Use whole cucumbers (smaller often are better) instead of slicing them (that works too).
2. Soak them in fresh, clean, non-chlorinated water for several hours or overnight and wash them with a brush. Remove all pieces of the cucumber flower that is left on the ends of the cucumbers to avoid mushy pickles!
3. You can pierce the skin of the cucumber with a fork to help the brine get in. If the cucumbers are very small and firm, this is not necessary.
4. Make the brine. The ratio of salt and water I use is 25 grams per 1 liter of water (I know, you will just have to figure that out! :)). Dissolve salt in the water. Use non-chlorinated water. Chlorine can kill the good bacteria.
5. Place cucumbers and spices, and a source of tannin in layers in a glass jar. I recommend using airlock jars to ensure success. For spices you can use a few whole cloves of garlic, some fresh horse radish, and fresh dill leaves, stalks and flower heads. (A spoonful of mustard seeds are nice too if not on AIP). A source of tannin can be grape leaves, oak leaves, horse radish leaves or even black tea leaves. In Finland they use often fresh black currant and raspberry leaves. I have even used blackberry leaves from my garden.
6. Leave an inch or two of space for the weight to keep the cukes under the brine and for some air space. To keep pickles under the brine, I often use carrot sticks in the opposite direction than the pickles under the weight.
7. Pour brine over the cukes and makes sure they stay under the brine, especially if not using an airlock! Then it is critical to ensure anaerobic conditions and avoid mold etc. harmful growth. Leave a little space before closing the airlock jar. Add some water to the airlock.
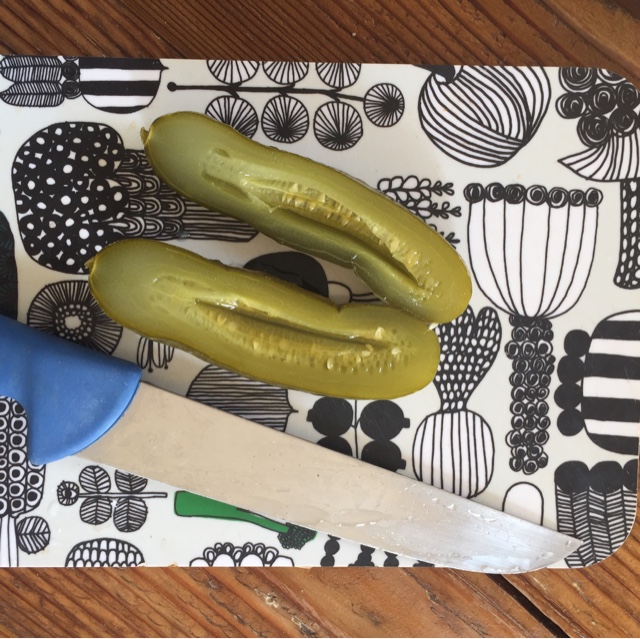
8. Put the jar in a dark place and ferment in room temperature for about 10 days. Do not open the jar in between. After 10 days move to the fridge. The pickles should be ready in a few weeks. You can slice one open and if there are still white spots or areas inside, it is not quite ready in my opinion.

Some people check the pH of the brine before moving the cucumbers to the cold. If the pH is less than 4.2, the brine protects the pickles from harmful bacteria growth. Below you can see two jars of pickles ready to ferment. One is with mustard seeds, the other without. Both have dill, one even the dill blossoms and for tannin to this one I added blackberry leaves. 


Monday, April 27, 2015

Sima - Mead for May Day

Mead (sima) is an essential part of May Day celebrations in Finland. Mead and homemade donuts! That's what a good May Day is made of. We also used to go marching with labor unions and leftist political party people on May Day. It is like our Labor Day. It also is the celebration day of all students. May Day is the celebration of spring. Everyone is outside, celebrating, on the streets and in the parks, there are picnics and general happiness in the air.


Mead is fermented so it needs to be prepared a week in advance. I am usually late so I have to leave it in room temperature for longer to be able to have it ready in 4 days. That is about the time I usually have when I realize that May Day is coming up. Like now. 

My parents used to make mead before every May Day. They used sugar, brown sugar, oranges, lemons, yeast and water. Usually I prepare it in the same way they did but this year I made also a honey version without cane sugar. It must be the more traditional way to make mead anyway. The Finnish word "sima" is a synonym for the nectar bees collect to make honey (mesi). We buy lovely raw honey locally from Klausesbees

In Finland mead is fermented so little that it doesn't really have alcohol, or the amount is very small so it is served even for children. My parents made the mead in a 10 liter plastic bucket and we drank it for days, if not weeks. They boiled the water, poured it on the sugar in the bucket, added sliced lemons and oranges and a tiny piece of fresh yeast. After a day they bottled it with a teaspoon of sugar and a few raisins and put it in the fridge. Usually around after a week the raisins had plumped up and were floating on top. That is how you knew the mead was ready. You looked at the raisins. I went every day to the fridge to look if the raisins were already floating on the top. It was very festive when you finally were able to taste the ready ferments and sparkly mead that tickled your tongue. There was not much alcohol at all but a lot of sugar left so it was sweet. Sweet and tasty. I loved to eat the raisins that had been soaking in the mead for days.

Honey mead (recipe is from Finnish beekeepers' association)

4 liters or 17 cups of water (almost 4 quarts) 
2 lemons (I used Meyer lemons from our tree)
14 oz honey (450 grams) 
1/5 tsp dry yeast

  • Boil about 1/4 of the water and pour it on the honey with the rest of the water cold to achieve slightly warm water. The honey will melt in it easily and it will be around the right temperature for the yeast. Dry yeast needs the water to be 105-110 Fahrenheit for it to start doing its job. 
  • Add sliced lemons. You can use oranges instead too if you like. Some people add the juice of the citrus fruit and some peel separately. My parents sliced the fruit so that is what I usually do too. If I am feeling very fancy, I squeeze the juice out and grate the peel and add them separately. 
  • Cover the container with a napkin or cheese cloth and rubber band, or even a lid, and keep in room temperature for 24 hours. Bottle it and add a few raisins to each bottle. If you have plenty of time, put the bottles in the fridge at this point and sima should be ready in 7 days. If you need your sima to be ready sooner, leave the bottles in room temperature for three days. To avoid the bottles from exploding as the mead ferments, you may want to "burp" them once a day (just open the bottle and close it back up).
  • You know your sima is ready when the raisins float on top. Serve with homemade donuts - wait, I have to start working on a paleo version of those.


To compare I made mead with the kind of recipe I grew up with. 

Sugar Mead

2 liters water (almost two quarts or 8.5 cups)
2/3 cups brown sugar
1/2 cup sugar
1 lemon (or orange or half of both)
1/10 tsp dry yeast

Follow the method above. Enjoy your Finnish mead!


Wednesday, April 23, 2014

New Fermenting Support Group on Facebook

Hi everyone!
I just wanted to let you know that I started a fermenting support group on Facebook. Anyone interested in fermenting any food or drinks is welcome to join!
Follow the link to Kaiku Culture!
Cheers!
Sirpa

Wednesday, February 12, 2014

Kombucha - Becoming Friends With Your SCOBY

I confess. When I first got the kombucha scoby from my friend a few years ago the living slimey gooey mushroomey thing grossed me out and I asked my husband to make the kombucha for us. I wanted to drink it but didn't want to touch the scoby.

After some time (long time) I got used to the scoby hanging out at our house, got curious about it and became friends with it. I started making kombucha and it is probably my all time favorite ferment to make. Here are my instructions - you'll find several different instructions online, with some variation. It has been a journey. I have learnt a lot. And above all, I have become friends with my scoby.

What is Kombucha?
Basically it is a fermented drink made out of sweetened tea using a SCOBY (symbiotic colony of bacteria and yeast). It has been consumed for thousands of years all over the world. Read more about it here and here.

What do you need to make your own kombucha?


A Kombucha SCOBY also called a kombucha mother or mushroom 
The SCOBY grows and can be cut in pieces so ask from a friend who makes kombucha or order one online (for instance from Cultures for Health, you can find a free ebook about kombucha making from the link as well). You can also grow your own (instructions in the end of this post).


A big glass jar
I use gallon jars. I have several as I have divided the growing scoby. You can order them online or sometimes find in department stores or thrift stores. If you buy food in big glass jars, save them. you don't even need the lids. The jar needs to be big enough for the amount of kombucha you are making, the scoby and some extra room for the growing scoby.

Cheese cloth, kitchen towel or a napkin
Instead of the lid you need something to cover the jar with. The scoby needs air so a cloth works well. It keeps bugs and debris out but let's the air circulate.

A rubber band or a piece of string
Use it to keep the cloth in place.

Tea
Black tea is used traditionally and is probably the best choice. Some flavored teas can damage the scoby. If you want you can mix in green tea or white tea. I often use a mix of about 2/3 black tea and 1/3 green or oolong tea. In my experience my scoby didn't like it when I used just green tea so I use mostly black. It is best to use organic tea to avoid pesticides from harming the scoby. I like to use fair trade tea so I know the people picking the tea have been fairly paid. If you want to avoid caffeine, you can try using decaffinated black tea. I use loose tea with reusable cotton tea bags or big stainless steel tea infuser mesh balls.

Sugar
I use organic fair trade cane sugar. Alternative sugars might not work very well. Unrefined sugar is best as it has minerals and nutrients left. Although some say some really raw unrefined sugars like turbinando might not be best as the scoby has hard time utilizing the nutrients from it. I am not sure but I know my scoby likes the organic cane sugar I use. The amount of sugar used is one cup per gallon. People warn against using less. I have to say though that over the years it seems to me that my scoby seems to prefer slightly less sugar. I have played around with it a little and I keep coming to the conclusion that the usual amount is too much for my scoby friend. I don't know why but listen to your scoby, that's all I am saying.

Water
The water should be clean. If your tap water is clean it works well, filtering it might be even better but not critical. The chlorine in the tap water might not be that great for the scoby but since you boil the water, it is not a problem as the chlorine evaporates.

Other things:
Bottles or jars
Funnel (you might not need it if you pour the ready kombucha in jars)
pH paper (optional)
Fruit juice, ginger etc. for secondary fermentation

The process of making kombucha

1 gallon water
1 cup sugar
About 5 tea bags or 2 tbsp loose tea
Starter liquid that came with the scoby (some kombucha from a previous batch) or vinegar

  1. Bring the water to boil and let it boil for a few minutes to kill any unwanted bacteria and remove chlorine.
  2. Add the sugar and mix until it has dissolved.
  3. Put the tea bags in or the loose tea in reusable bags or mesh balls (or strain the tea later if you put loose tea directly in the water).
  4. Steep for a few minutes and remove the tea bags or strain the tea.
  5. Let cool to room temperature. Keep the lid on to avoid any extras from falling in (I had once a package of gum fall in my pot from the shelf above the stove...)
  6. When it has cooled down, take your jar and add the sweet tea in it. Make sure there is space still for starter liquid and the scoby.
  7. Add the scoby, the starter liquid or if you don't have any, add a splash or two of vinegar. If you bought the scoby dehydrated from online, follow their directions.
  8. Cover with a cloth and rubber band and place in a dark place in room temperature. Dark is better as it discourages the growth of some unwanted organisms as light encourages it.

  9. After a week check in with your scoby. Does it smell sour? Does it taste sour? You can even measure the pH with pH strips you can buy online. Make sure they go low enough (some stop at 7). Your kombucha is ready when the pH is 4 or under.


  10. When you have determined it is ready, pour the kombucha in bottles or jars that close tightly. Close the bottles or jars tightly and leave them to room temperature for secondary fermentation for another day or two to create some carbonation. If you are making plain kombucha, add just a little bit (maybe 1/4 cup) of the sweet new tea to the bottles to give them a boost. You can also add fruit juice, pieces of fruit or ginger (or juiced ginger) to the bottles. After a day or two they are ready to drink or move them to the fridge for later. They keep for a long time.


  11. Remember to leave some of the kombucha with the scoby in the jar for the next batch (1-2 cups should be enough, sometimes I leave more). I don't always even remove the scoby from the jar, I just pour carefully making sure the scoby doesn't fall out or touch anything. You can also lift the scoby out and put it back to the new liquid. If it has grown very big, you can cut it in half or quarters and give out with some of the kombucha as starter liquid to your friends. It is also a good idea to keep a piece as a backup if your scoby would go bad. I cut threw the layers, I don't separate the layers. Sometimes I might remove the bottom layer if it is getting loose or very dark and stringy. The new layer is on the top. But otherwise I leave it untouched. You might want to leave a piece to the fridge with some of the liquid from the batch as a backup.

  12. Fill the jar with the new sweet tea, the starter liquid (kombucha from previous batch or a little bit of vinegar) and the scoby. Cover and repeat the process.


How to grow your own scoby?
  1. Buy a bottle of raw plain kombucha from a health food store.
  2. Pour it (including any bits there are, it is probably the baby scoby! Awww!) in a glass jar, leaving a little bit of space for growth.
  3. Make a sweet tea following the kombucha making instructions above (you'll need less than a gallon now to start with, make let's say a quart with 1/4 cup sugar and one tea bag or half a quart with 2 tablespoons of sugar and a tea bag).
  4. Let the tea cool down and pour it in the jar with the store bought kombucha.
  5. Cover according the regular instructions above. 
  6. Leave in room temperature in a dark place and check weekly. When the scoby on the surface of the liquid has grown to about 1/4 inch it is ready. Make then kombucha using the instructions above. Save the liquid for starter liquid. if you made a quart of tea, you can drink some of it, I know it is exciting to start drinking your own kombucha!

Remember: The scobys can look different. Sometimes they first sink to the bottom. It is ok. People often worry about their scobies. But unless there is hairy black or blue mold growing on it or it smells rotten or all the liquid has dried from it, it probably is ok.


Do you have any questions? I am more than happy to answer - just post your question in the comments below or use the contact form in the right side panel to send me an email. Or email me at info @ kaikulifestyle.com.

Enjoy the kombucha!

Sirpa

PS. Still want to know more about kombucha? Learn more, read, watch videos, browse recipes etc. from here.

Tuesday, February 11, 2014

Homemade Fermented Rootbeer

I tasted root beer for the first time I moved to the US. It was some store bought commercial root beer. I didn't like it much. Then I tasted fermented home made root beer and fell in love with it! The best part of it is that it is probiotic too due to the fermentation process!

I have tried two recipes for home made root beer. The one in this post I have learnt from a local culturing club (Culture Club 101) and the other I have used is from Nourished Kitchen. The main difference is the herbs used. You can use just a few different herbs, root and bark or several different kinds for a more complex flavor. It depends a lot on how many different kinds of herbs you want to buy. You can also play around with different sweeteners like maple syrup, sucanat or cane sugar. I would recommend though to use organic ingredients so the pesticides don't interfere with the fermentation process.

Home made Lacto-fermented Rootbeer

1 gallon of filtered water
2 tbsp wintergreen
2 tbsp sassafras bark
2 tbsp sarsaparilla root
1/2 vanilla bean cut in half
1 cup maple syrup, sucanat or cane sugar (I used maple syrup)
1 cup (or more if you have to spare, up to 2 cups) of ginger bug (see recipe here) - I read once people using water kefir grains too but haven't tried it myself

1. Put the herbs and vanilla on the bottom of a big pot (you can half this recipe if you don't have a big enough pot) and add water.

2. Bring to boil and simmer on low for about twenty minutes.

3. Add sweetener and let cool down to room temperature.

4. Add the ginger bug and pour the root beer to ferment in a 5 liter Picklit jar or some other big enough glass jar (or several smaller jars). Leave to ferment for one or two days in a warm place. Don't leave out for too long, it can get alcoholic.

5. Transfer to bottles and leave out for an extra day or two to get some carbonation in the root beer. Move to fridge. I find that it gets better after a while in the fridge but technically it is ready to drink now.

Monday, February 3, 2014

Fermented Blueberry Jam (Probiotic and Vegan)


I found the directions for the fermented berries from Oh Lardy - who I think get their inspiration from Nourishing Traditions.

Fermented Jam from Fresh Blueberries

12 oz (about 2 cups) of fresh blueberries (preferably organic)
2 tbsp of raw honey (optional)
1-2 tbsp culture from a previous ferment like sauerkraut (or whey but it is from milk so I don't use it, or some sort of starter culture you can buy online)
1/4 tsp salt (I use Himalayan pink salt)
filtered water

1. Put the berries into a wide mouth pint size mason jar or a Pickl-it jar.
2. Press the berries down with your washed hands or with a wooden spoon or something similar. It is ok to if the berries structure break a little bit and the juice starts oozing out. You can also puree them if you like.
3. Mix all the other ingredients in a cup and pour in the jar.
4. Fill jar with filtered water to the shoulder or little below. Leave about an inch room, otherwise your fermenting jam might climb out of your jar or your jar burst as the pressure builds up.
5. Press the berries down with a spoon or your fist. All the berries should be under water for them to ferment well and to avoid unwanted bacteria or mold from developing. You can use a small plate, a clean rock or a plastic bag filled with water as a weight to keep the berries under the brine. If you use an airlock system like the Picklit, it is not as critical to keep them under water. The fermenting time is much shorter in this type of ferment as well than in fermented vegetables so I think in general the under the brine rule in this is not as critical. I have made condiments like ketchup and mustard I keep out for a couple of days only and they are not under the brine. If you puree the berries you won't be able to keep them under the brine.

6. Put the lid (and airlock if using) on and leave to room temperature for 24-48 hours. Don't keep it out longer as it can turn alcoholic. If your room temperature is really high, shorten the fermenting time. The jam is ready when there are some bubbles and the berries taste a little bit sour.

7. Move to the fridge. It will keep a couple of months. 

Thursday, January 23, 2014

Fizzy Water Kefir – A Healthy Homemade Soda (Difficulty level: Easy!)

Water kefir is a caffeine free, probiotic and fizzy! Water kefir is made of water and sugar and additional fruit juices can be added. Water kefir is fermented only for a day or two. It is easy to make and don’t require a lot of effort or special skills.

Water kefir grains multiply quickly so you might find someone locally who is willing to share theirs. You can also order dehydrated water kefir grains online. Follow their instructions for rehydrating them – or you can also find instructions online.

How to make water kefir?

2-3 tbsps or more rehydrated water kefir grains
1 quart of water
2-4 tbsp organic sugar (do not used refined white sugar that is stripped of minerals, the grains will need the minerals for nourishment)
A pinch of baking soda – this is for pH
One inch piece of kombu sea weed (some use bone meal instead) – this is to feed the grains
You’ll also need a 1.5 quart ball jar or a jar with an airlock (I use Pickl-it) or a cheese cloth or kitchen towel and a rubber band or piece of string to cover it.


1.  Place your grains in the jar.

2. Add water, sugar, baking soda and the kombu. At this point some add dried fruit. I find that my kefir has gotten slimy if I add dried fruit now so I skip it. Leave space to your jar, don’t fill it to the rim.

3. Mix with a spoon (or don’t mix, I don’t think it is critical, I sometimes skip this step). Close the lid and attach airlock if using. If you close the lid completely and don’t have an airlock, some pressure can accumulate in the jar from the fermentation process. If you leave it out for a long time, burb the jar by opening it after a day or two to let the pressure out.

4. Let ferment in room temperature and in preferably a dark spot for 24-48 hours. When bubbles are forming it is ready. You can also taste the kefir before you start fermenting and after and it should be less sweet when it is ready as some of the sugar has been used in the process.

5. Strain the grains from the water kefir to make another batch. People say metal strainers aren't good for this purpose because they will weaken the culture. I am a rebel and I use a stainless steel strainer (never aluminum though, heard that is the worst). I don't leave them to sit in it though so they touch it just briefly. I don't like plastic so I don't want to use a plastic strainer and the bamboo strainer is hard to clean. But I put it on the photo as it should be a better option. I usually leave some of the liquid in the new batch to help it but I do not know if it is necessary.

6. Now you can either drink the kefir or bottle it for a secondary fermentation: Put the kefir in a bottle with a flip top lid or some other air tight seal top. You can add some fruit juice (or dried fruit) at this point to help make it bubblier. One of my favorite flavors is apricot-pomegranate.

TIP: Using high fructose juices like pear or
apricot make the best bubbles in my experience.

7. Leave the bottles out for another day or two and then move them to fridge. It is ready to be consumed anytime.

My favorite water kefir flavors:
- Water Kefir Lemonade: Add a juice of a lemon to the secondary fermentation to make a lemonade tasting water kefir!
- Apricot Pomegranate: Add about 5-10% apricot juice and just a splash of pomegranate juice for color to the secondary fermentation. Juice squeezed by you from fresh pomegranates is the best. I tried the store pomegranate juice but it didn’t taste as good.
- Pear Ginger: Add about 5-10% pear juice and just a hint of fresh juiced ginger (or a few pieces of fresh ginger) to the secondary fermentation.

-Lemon tangerine: For the secondary fermentation add a juice from one lemon and 1-2 tangerines to a little bit less than a liter of water kefir.

What are your favorites? Do you have any tips to share?

If you are new to fermenting and have any questions, feel free to ask them in comments or by sending me email from with the contact form in the right side panel.

Saturday, January 18, 2014

Chocolate Pudding (Vegan and Paleo)

*I have been recently posting autoimmune paleo recipes so just for clarity's sake I have to state that this recipe is not autoimmune paleo as it has cacao powder. I made it for the kids who don't follow the protocol as strictly as I do.*

I learnt this recipe from a friend but have lost the original recipe and I basically create it every time again. Also... I don't usually measure so the amounts on this recipe are approximate and flexible, just taste the food in between, add more what is needed and follow your cook's instinct!

Chocolate pudding
paleo, vegan
 
2 avocados
1/3 cup raw unsweetened cacao powder (feel free to use less or more depending on your preference)
A pinch of salt
Vanilla from a vanilla bean to taste
Maple syrup to desired sweetness (I just used a splash of it)
A splash or two (or enough to make the blender run smoothly) of home made coconut kefir for added creaminess and probiotics


Add all ingredients in the blender and blend them until smooth and creamy. That's all! Eat plain or dip fruit in it. I think my child once dipped chicken pieces in it...

TIP: You can soak chia seeds (not allowed on autoimmune paleo either) in coconut kefir and it thickens the pudding nicely. Use then a little more kefir though and it helps to keep it in the fridge for a while before eating too.

Friday, January 17, 2014

Little Desserts: Probiotic Blueberry Frozen Yoghurt (Vegan, Paleo, AIP)

On this 30 day autoimmune paleo diet trial we have allowed ourselves a scoop of coconut milk ice cream once a week. Last time we made raspberry ice cream. The ice creams are autoimmune paleo friendly but if you are following the diet you should stick to a small portion as it has fructose.

The sign of a successful food is: No photo for blog because food is consumed so quickly and there aren't any leftovers for a photo. This amount served two adults and two children and left one child asking for more.

Blueberry Frozen Yoghurt
vegan, AIP, PALEO
 

1/2 cup of coconut milk kefir (instructions how to make it)
1 cup frozen wild blueberries (I prefer these as they are not so sweet)
A pinch of salt (I used Himalayan pink salt as usual)
3 tbsp maple syrup
A little bit of vanilla from a vanilla bean

Puree the ingredients in a blender and put in an ice cream maker until ready. Enjoy!

Sirpa

PS. If you don't have an ice cream maker yet, get one. You can easily make healthier ice creams at home. Even the coconut milk ice creams in health food stores have icky additives like xanthan gum. I bought one that has a freezer bowl for 20 dollars from Craigslist. I will post more coconut milk ice cream recipes later. Our favorite flavors are: green tea, date maple, pumpkin pie, chocolate mint and chocolate of course. I actually like plain vanilla a lot.

Homemade Coconut Milk Kefir


I make my coconut milk kefir the easiest way possible. I learnt about it from a friend and went to get some regular milk kefir grains from a local place selling ferments. It turns out very delicious. And it is full of probiotics. Way more than the store bought kefirs. How do I know? I don't know exactly of course but the store bought ferments don't seem very alive to me. If you leave a store bought fermented food out, it doesn't seem to keep fermenting. This one - if you leave it out for a while lid tightly closed and then open it, you can hear from the fizzing sound that it has been hard at work fermenting. It looks alive, it bubbles and froths. But it tastes better than the store bought coconut kefirs in any case.

Ingredients:

1 tbsp or more milk kefir grains (see below from where to find some)
1 cup (or more for more grains) coconut milk (buy full fat and additive free or make your own)

Here are the steps of making your own delicious probiotic kefir:

1. Obtain milk kefir grains. Google or online sources or find a local source (like your local Weston A. Price chapter) or a friend who has plenty to share.

2. If you are sensitive to cow's milk, rinse the grains well with filtered water (chlorine can kill them). In my experience it took a few batches to get all the cow milk out of the grains (if it completely ever leaves but my dairy allergy symptoms left after a few weeks of making batches all over an over again and I also rinsed the grains in the beginning in between the batches). People say aluminum strainer is not good to use in contact with the grains. Some say no metal at all but I have used stainless steel strainers, it has been fine. if you are worried about it, use a plastic or bamboo strainer.

3. Place the grains (about a tablespoon should be enough) in a glass jar and add about a cup of coconut milk. I use additive free coconut milk called Aroy-D. Be careful with coconut milks as they contain possibly gut harming additives like different gums as thickeners. You can also make your own coconut milk.

4. Cover the jar with a napkin or something similar (I use old napkins, they are the right size for a small jar) and put a string or rubber band around the jar's mouth to keep the cloth in place. Place on the counter or in a cupboard (keep several feet in between different ferments if you have other ferments in your kitchen, they might contaminate each other and weaken the grains or the other cultures like your kombucha scoby). (I have been told now an airlock jar would be great for the kefir too and I am in the process of trying it out.)

5. Let it ferment for 12 to 36, even 48 hours. Taste it to see if it is sour enough for you. If you have too many grains, the whey might separate from the creamy part. Try using less grains for that amount of coconut milk. Or add more coconut milk for the next batch. Or divide them in half and get two batches going. Or share with a friend. Note that the grains will start growing too at some point.

6. Strain the kefir and start a new batch with the grains (no need to rinse in between - unless you want to do so like I did in between the first few batches as I worried about the cow milk contamination).

7. Drink the kefir right away or store in the fridge. It starts to thicken in the fridge and can become solid in a few days. You can find new uses for it then.

TIP: Use the coconut milk kefir in puddings, smoothies, as a base of home made probiotic ice cream, in place of sour cream when thickened in the fridge, eat as a yoghurt with fruit and berries or with honey. You can also strain it through cheese cloth overnight in the fridge to make kefir cheese. My favorite is to eat the kefir with pomegranate seeds or any berries.

Wednesday, January 15, 2014

Easy Fermented Vegetables

From left to right: 1) Daikon and beets (grated) 2) Red cabbage, cauliflower, zucchini and carrots chopped in pieces and 3) Grated carrots (1 lb or so) and an inch of ginger 
Lacto-fermenting vegetables is an old way of preserving food from times before refrigerators and freezers. Fermented food can keep for a long time. That is not the only reason to ferment your foods though. Fermented food has probiotics, added nutrition and it digests better because of the enzymes they contain. The taste is pretty good too. Try it, you'll love it. And no, it is not difficult or complicated. It didn't take me long at all to put together these three beautiful jars tonight (although I did have my husband grate the vegetables).

Did you know that many of the condiments you eat that have vinegar in them used to be fermented just with salt and water? Using vinegar is a short cut. The modern food industry doesn't have time for fermentation unfortunately. But I promise, when you start eating traditionally fermented foods, you'll notice that they taste so much better than the vinegary olives, pickles and condiments. You can even make fermented ketchup and mustard, they taste wonderful!

Fermented vegetables

Ingredients:

Vegetables- you can use basically any vegetables: carrots, cabbage, cauliflower, beets, zucchini, turnips, daikon...

Spices (optional) - cloves, ginger, garlic, dill...

Salt water (3 tablespoons or 25 grams of good quality salt - I use Himalayan pink salt - diluted in a liter which is a little more than a quart of water).

Whey or liquid from a previous ferment (optional)

1. Chop the vegetables or grate them, put them in a jar and press them tightly down in a Mason jar, a fermenting crock, a Picklit fermenting jar or something similar. Fill the jars little lower than to the shoulder. Leave a little bit of space for the weight and brine.

2. Pour salt water over the vegetables. To fasten the process you can add whey in the salt water (if you are not sensitive to dairy) or some liquid from a previous ferment (I used my sauerkraut liquid). All the vegetables should be under the brine in anaerobic conditions to avoid them from molding or going bad.

You'll need some sort of weight to keep them down. Picklit jars come with glass weights that are super handy. I sometimes put still carrot sticks under the weight to keep all the vegetable pieces under water. For a weight you can also fill a plastic bag with water, use a small plate or a small jar or even washed rocks (I have used rocks and plates when making salted wild mushrooms before). I have even heard people use a clean piece of wood. One trick if you are using cabbage (this works for sauerkraut too) is to save some of the outer leaves, cut it a little bigger than the mouth of the jar and put it on top of the vegetables pressing the edges tightly down to the sides to keep everything down. This works only if you have the vegetables in the jar very tightly. You can use a wooden spoon or something similar to press.

3. Close the lid when you've made sure everything stays under the brine. Attach the airlock (with water) if using and ferment in a dark place for at least 4 days. Then put them to the fridge to continue fermenting. I have heard of people keeping them out for 10-14 days. I keep my fermented cucumbers out for 10 days and sauerkraut too. These ones I will try with the 3-4 day method as they have a starter too.

4. Always inspect and  smell the ferments before eating them. taste a little piece to see if they are ready and good to eat. Your senses will tell you if something has gone wrong with the fermentation process. It has happened to me a couple of times but most often the ferment has been just fine and very delicious too.

If you have any questions, don't hesitate to ask in the comment section or via the contact form on the right side of the blog. Good luck!

Sirpa

Saturday, January 11, 2014

Homemade Ginger Ale

Homemade fermented ginger ale is not only delicious, it also contains beneficial probiotics and enzymes. Ginger has many health benefits too (fresh ginger might be more effective though). Ginger can help with digestive ailments and nausea and reduce inflammation. I used to take it for morning sickness and for a while after I couldn't stand the smell of it. Now I love it.

It seems like the recipe has a lot of sugar but the fermentation process consumes a lot of it. The good bacteria use the sugar for their nutrition. I like to let mine ferment long enough that it isn't super sweet anymore.

Fermented ginger ale 

A piece of fresh ginger (an inch or more if you like strong gingery taste)
2 quarts of water (8 cups)
1/2 cup of ginger bug (see below)
Pinch of sea salt (to add minerals to the filtered water)
1/2 cup of unrefined cane sugar
(Lemon)

Start by making a ginger bug (unless you have a friend who can share some of theirs like I did, thanks Michelle!). Ginger bug is the starter that starts the fermentation process. Here is how you make it:

1. Take a a pint size mason jar and put 1.5 cups filtered water in it. Chlorine can kill the good bacteria so don't use chlorinated water in any ferments.

2. Add a teaspoon of chopped ginger (organic would be best) and a teaspoon of sugar. Mix and put a lid on. Leave it in room temperature for several days. It gets bubbly when it is ready. You can then store it in fridge indefinitely.

3. After using some of your ginger bug for your ginger ale, add fresh filtered water to replace what you used and a teaspoon of ginger and sugar. Feed it every day you have it out. You can put it back in fridge in a couple of days.

Next make your wort:

1. Boil about two quarts of water with a few slices of ginger. You can play around with the amount in different batches depending how gingery you want it. Let it simmer for 30 minutes or so.

2. Add 1/2 cup of sugar to the hot water after you have turned the stove off so it won't burn in the bottom of the pot.

2. Let it cool down to room temperature and add the ginger bug and lemon juice if you want to use that (juice of half a lemon or so).

3. Pour the wort in big mason jars, Picklit jars or something similar. Leave a little bit of space, don't fill above the shoulder. Attach the airlock and add water in it if using. You can make this without an airlock jar as well in a regular jar with a regular lid. In this case remember to "burp" it though then from time to time if you leave it out for very long (just open the lid and let some carbonation out).

4. Leave out for a couple of days to ferment. It is ready when you can see little tiny bubbles rising from the bottom.

5. Transfer to bottles that you can close tightly. I use these from Ikea. Amazon sells some similar beer bottles for home brewers too. Leave them out for a day or two so they become carbonated.

6. Transfer to the fridge. I like to let them ferment in the fridge for an additional few days but you could drink it before as well. Enjoy! Let me know how it goes, I am always curious to hear other's experiences in fermenting.

Wednesday, January 8, 2014

Grain Free, Dairy Free, Egg Free and (Autoimmune) Paleo Breakfasts


We are so used to our grains or eggs for breakfast that if that is not an option it seems hard to find other breakfasty stuff to eat. Here are some ideas for paleo breakfasts.

If you avoid fruit, skip the ones containing fruit. Avocado is a fruit too by the way but low in fructose. I have eaten some occassional fruit in very small quantities as I don't tolerate big amounts of fructose. Coconut is a FODMAP too so skip that if you are avoiding those.

Breakfast ideas for (autoimmune) paleo diet followers (I will update this page as I come up with more):

Drinks:

Black, green or rooibos tea if not avoiding tea, herbal teas, water with lemon, bone broth, kombucha (if not avoiding tea) or water kefir, fermented home made ginger ale or root beer (will post soon... there is so much to post about!)

Foods:

Leftovers (this is my favorite, so easy!)

Plantain pancakes (plantains are low in fructose but go easy with the maple syrup)

Berries (often low in fructose) or pomegranate (high in fructose, so stick to a very small quantity) with a small amount of homemade coconut kefir (I might make another post about coconut kefir but basically I make mine using regular milk kefir grains in coconut milk, super easy and oh so delicious!)

Breakfast wraps: Fill either collard greens, lacinato kale or coconut wraps with foods you have available like carrots, avocado, cucumber, squash, fermented veggies (if store bought, check the ingredients!), naturally cured olives (check ingredients that they are just salt and water), lettuce, chicken, shrimp. Wrap them. I wrapped the collard greens just like cabbage rolls - which is a great autoimmune paleo food too with some modifications, I will make a post about that later.

TIP: Put the avocado first on the leaf and smash it with a fork to a quick sauce, the foods will stick into it and it will hold together better

Mashed cauliflower (FODMAP so don't overdo it) porridge with organic palm shortening and sea salt (boil some cauliflower, dicard most of the water and mash the cauliflower in the remaining water, add palm shortening and salt)

Filled avocado: Half an avocado, remove the seed and fill with shrimp, sprinkle with sea salt (Herbamare if not avoiding onions) and squeeze some lime on top

Smoothies:
-raspberry, banana, spinach or kale
-greens, berries and just a little bit of coconut milk (optional)
-greens, apple (high fructose so be careful with the amount) and limes
Add kombucha to any smoothie if not avoiding tea

(remember to keep the amount of fructose per day in minimum though, some recommend max 20g/day).

Soup that has been in the slow cooker overnight (home made broth, meat and AIP legal veggies, mushrooms (FODMAP), can be spiced with salt, herbs, ginger and garlic if not avoiding)
OR: Stew of meat and veggies and broth that has been in the slow cooker overnight

Avocado and cucumber with smoked salmon or cooked shrimp - you can also put all these in nori wraps "taco style"

Stir fry with any meat or sea food and zucchini, asparagus and mushrooms - spinach or kale might be a nice addition (for faster mornings, chop ingredients already in the evening and store in a jar in the fridge), add sea salt and herbs

In the toaster oven: bake sliced zucchinis (put some olive oil on them and for instance Herbamare salt if not avoiding onions) and premade breakfast sausage/meat patties / meat balls (fry or bake ground meat in any shape you like, you can add herbs, salt, apple sauce, mashed boiled cauliflower, coconut flour etc. to the "batter"). Eat with sauerkraut, fermented pickles (check ingredients and watch out for mustard seeds and peppers) or carrots, rutabaga or turnip sticks.

Monday, October 21, 2013

Apples make my fall (fermented apple sauce, oh yes!)

Apple sauce starting the lacto fermentation process in my Pickl-it Jar.
I love apples. And I love fall. I have been lucky to buy certified organic apples from my local Farmers Market this fall. I also ordered a 20 lb box of apples from Azure Standard so I have had a lot of apples to make good stuff from. I have juiced a lot (my favorite combo is apples, kale, ginger, garlic).

I also made apple sauce with a recipe from Elana's pantry. I have used this recipe before but made it today in a slow cooker. I added a little bit of water with the apples as I was worried it would dry in the slow cooker. It has made my house smell delicious all day! Forget scented candles, sprays and other fragrances. Just make yummy stuff in a slow cooker. My slow cooker is working sometimes day and night as I make my bone broth in it as well and I cook it for 24 hours. But that is another post.

I also experimented by making fermented apple sauce! What a great healthy probiotic snack to pack to your child's school lunch! I am so excited and can't wait until it is ready to taste. Here is the recipe:

Lacto-fermented raw apple sauce

Several apples, cored, peeled (if you wish) and chopped
A couple of tablespoons of liquid from your fermented sauerkraut or water kefir or kombucha (or whey, but I don't use it as I want to make this dairy free)
A pinch of sea salt or Himalayan pink salt
Cinnamon to taste (optional)

Puree apples in a food processor to desired consistency. Add other ingredients and mix. Pour mixture to a clean glass jar with a lid or your fermenting jar. I use a Pickl-it jar with an airlock to provide the ferment an airtight environment. Leave an inch or so space under the lid. Leave for a couple of days in room temperature in a dark location. If you use a jar without an airlock you can consider "burping it" daily to let out any gas the fermentation process is creating. Move to the fridge. Monitor for any bad growth and that it doesn't start turning alcoholic.

What is lactofermentation? Read more from here:
http://en.wikipedia.org/wiki/Lactic_acid_fermentation
and  here http://gnowfglins.com/2011/08/23/lacto-fermentation-vessels/

Fermenting increases nutritional value and digestability (and makes food delicious!)

From left: Coconut milk kefir, kombucha, home made bone broth, fermented pickles, ginger ale, elderberry syrup, home made deodorant, ginger bug, sauerkraut.
I have been experimenting with fermenting but now I am really getting excited about it. The store bought vinegary pickles, mustards and commercial sodas don't taste that good to me anymore either after getting the taste of the real stuff! My fridge is starting to fill with ferments like sauerkraut, pickles, kombucha, water kefir, ginger ale, ginger soda, coconut milk kefir, coconut water kefir, ketchup, mustard, apple sauce. I will make separate postings of all these ferments soon.

In the old days they used to ferment most foods to preserve them since they didn't have fridges. It was a necessity. But most of us have lost these skills. In the process the food became more easily digestible and the nutritional value increased. I read on a website somewhere that there would be much more probiotics in fermented foods than there are in the probiotic supplements you buy from the store.